While this method of printing to the Xerox is most useful for our Mac users, it also is convenient and reliable for Windows users, personally owned staff/faculty devices, etc. To get to the web printing interface for the Xerox printer, click on this link (or type the following address in teh URL of your browser: http://172.16.1.34/print.htm). Please bookmark this page for future reference
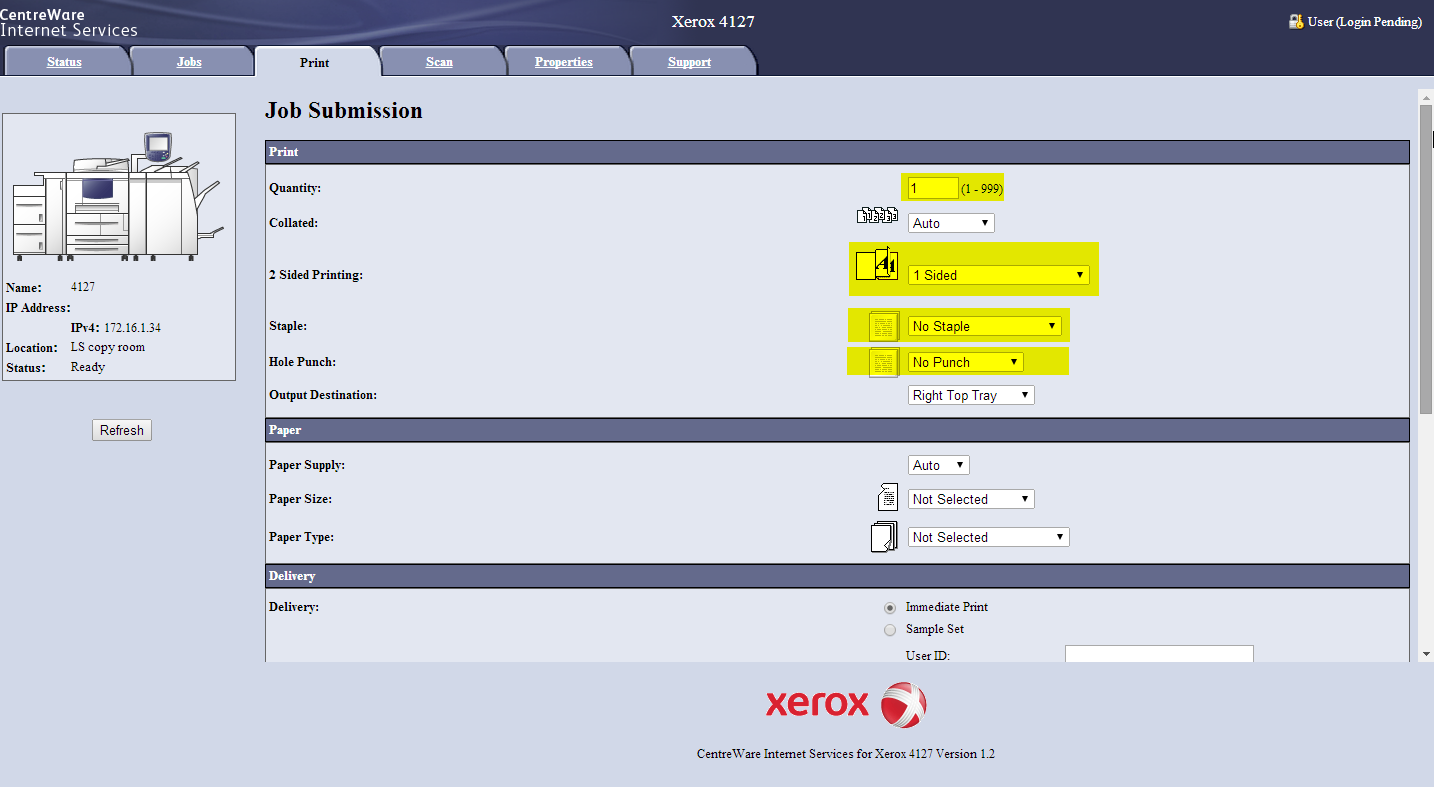
1. Select your options
The fields that are highlighted in yellow are the settings that are relevant to your print job. In most cases, the number of quantity (copies) is the most used option followed by 2-sided printing, stapling, and hole punching. After the selections are made, scroll down to the bottom.
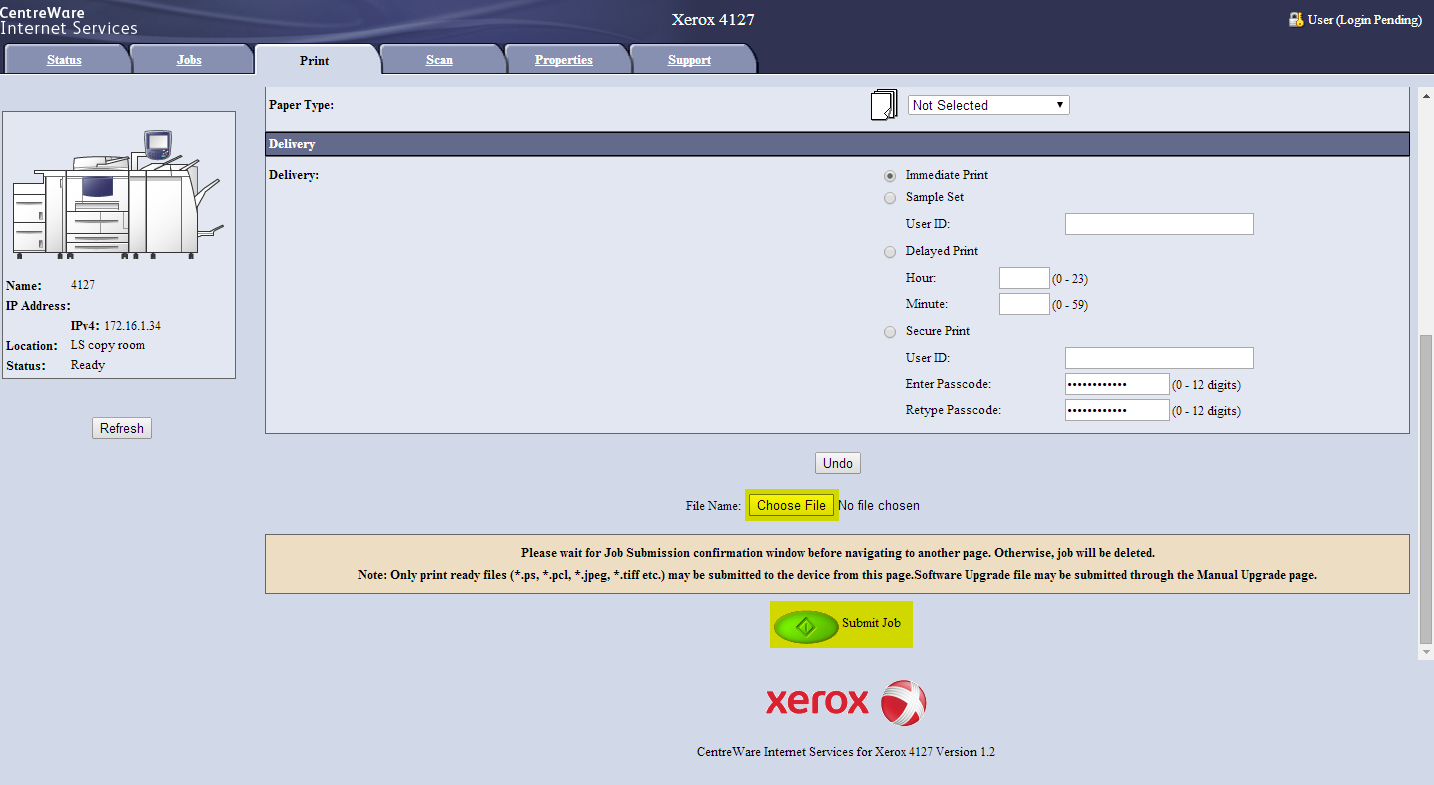
2. Select your file to upload in .PDF only!
A yellow cover page is printed at start of each print job but with the web interface, the username that is usually printed out on the yellow cover page is Administrator. The filename of the document is also displayed on the cover page so we recommend that you rename the file that includes your name in some form such as BobDoe_test.PDF. This is used to distinguished your documents from others.
Select a .PDF file from your computer that you want to print out. Be aware that selecting the page range to print from is not possible with web printing. After the .PDF file is selected, go ahead and click the upload button. Your print job has been sent successfully so go ahead and pick up your document. Happy printing!
0 Comments